Want a simple way to learn animation? Want a way to create 1 minute short films in less than 20 minutes? Well, you've come to the right spot!


 Click the setup scene button, and you should come here:

3. Resize

Once you click that button, you should come to a window that looks like this:
Don't worry about the buttons on the sides. They are not important. if you want to go change your scene and move, add, or remove characters click the setup scene button. The next thing you need to do is edit an actual character! Click the arrow next to where it says 'this'. if you added a character to your scene, they should appear. When you click on your character, the sidebar will look this: Your's won't look the same as mine. I named my character Alice. I also have a procedure, which lets me use the same code over again. As for everything else, there are only two really important ones on this. The turning procedure, which will let you turn left and right, but also forward and backward, which will essentially tip you in the corresponding direction. The second procedure is the move procedure, which will let you move left, right, forward, and backward a specified number of units. Keep in mind, if you don't use the turn procedure prior to using the move function, you will just move to your direction sideways, unless you are moving forward or backward.
I took a free, 8-week course on Coursera. The link is below if you would like to take the course, too.
Alice Animation is a simplistic way to make animations. Since this platform is for younger and not professional users, so you might think the animation looks a bit strange a first. But not to worry! Combined with storytelling and lots of movement you can actually make some pretty cool animations. So without further ado, here's a prequel for my steps to learning Alice:
1. Download it.
Simply go to this link: https://www.alice.org/. Once you click on it, you should be brought to a website that looks like this:

Go to the "Get Alice" tab to begin the download, you may look at the other tabs to learn more about Alice if you like. Once you get to the right tab, download the latest version of Alice. Follow the setup instructions, and voila! you have Alice on your computer now! You are now ready to start experimenting with the website.
2. Getting Started
Before you get into the professional part of Alice, its best to experiment first. Go to the set-up scene. Worry about programming later. When you open Alice, something like this should pop up.

Good! These buttons will just depict your setting. You can switch between them later. Choose which one you want, and you should come to a screen that looks like this(i chose grass):


the gold button below represents the different items you can drag or click into your scene. If you click on bipeds, you can see some humans. Click on any one of the humans, and you can see something familiar! Something like the sims. You can choose what type of human, gender, waist, clothes, hair, and skin color. once you click okay, rename your character. it will appear in the scene.
Yay! you made your first character! Continue exploring the types of characters there are. Not everything can be custom made, but there are different versions of things. Please remember bipeds are charters that have two legs. Quadrupeds have four legs. Sometimes, items may not be where you expect. You can also search for them. Go have fun!
3.Moving Your Characters
Now that you've learned how to put characters in the scene you need to know how to move them around, during experimenting, you need to learn the different ways for altering your characters, if u look in the gold circle, you'll see four buttons. the picture is blurry, so here's what the buttons say from left to right
Default, Rotation, Move, Resize. Let's go over each one


 |
| This is what your character will look like when you click the default |
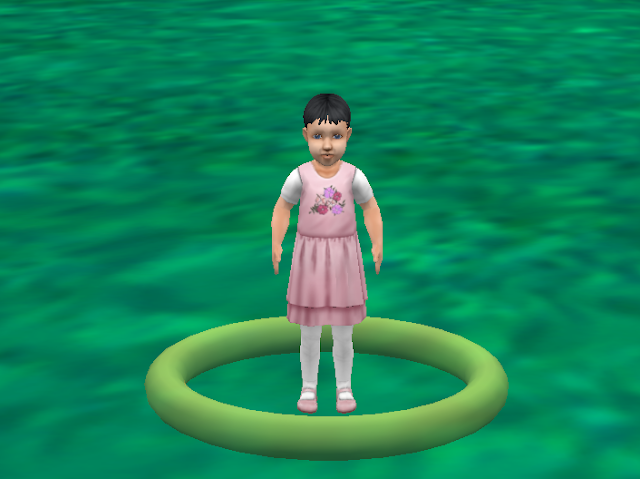
1. Default
The default is the one you were probably using. when you select or click on an item in default, a yellow ring will appear around them on the purple sidebar, you can also resize your character by adding numbers. If you resize a custom made human, it will become disproportionate. You can move your character back forth, and left and right, and any direction. If you hold shift, you can also move up and down. You can also use the yellow ring to turn left and right.
2.Rotation
 |
| A Character after being rotated a bit |
With this mode, you can't move your character in any directions, however you can use the rings to rotate your character. The blue rings will tilt your character forward(you can achieve in the code section by using the roll command to turn backward or forward). The red ring will accomplish the same thing the default ring does, which is turning left and right(you can achieve this in coding by using the turn function and turning left and right). The last ring, the white one, will roll you, you can achieve this in coding by using the roll command.
 |
| Custom Character Resizing |
 |
| Regular Character Resizing |
3. Resize
This is one that can go wrong if you have a custom made character. They can end up super stretched out like seen in the picture below. However, any other character will resize as normal. Keep in mind you can not move the character in this mode. You can only resize. On the purple sidebar, you can enter a specific number, and the other measurements will correspond.
4. Move
Once again, this one does what default doesn't, except you can't rotate. Use the arrows to move your character around, and you can also move your character up by pressing shift.


5. Finally, let's get to the basics of coding
Alice is not different from block coding! If you experiment with a few things, you'll discover there are such things as if statements, else blocks, and variables. But I'll help you get started with the basics. The first thing you want to do is open up the edit coding button


That's it! You've completed a basic understanding of Alice. Time for you to complete the real thing with the link below!
Comments
Post a Comment